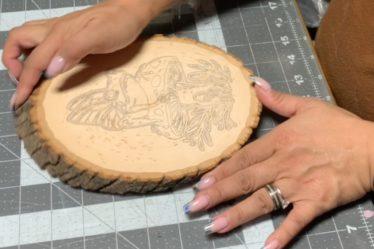

I’ve been doing pyrography professionally for about five years now, and over that time I’ve learned a lot—often the hard way. I read the books, followed the experts, and picked up plenty of valuable techniques, but there are still some lessons you only learn through trial and error.
Looking back, there are a few foundational things I wish someone had emphasized earlier. These are the habits and insights that would have saved me time, frustration, and a few ruined pieces along the way.
Today, I want to share three of those with you—especially if you’re just getting started.
1. Sand Your Wood (More Than You Think You Need To)
One of the most overlooked steps in pyrography is surface prep. It might not be the most exciting part of the process, but it makes a huge difference in your final result.
No matter where you source your wood—raw, partially sanded, or even pre-sanded—I almost always sand it myself. This ensures the surface is exactly how I want it before I ever put my nib to it.
Why sanding matters:
1. A smoother surface gives you better control
When your surface is properly sanded, your pen glides across the wood instead of catching. That means fewer “blobs,” fewer unintended dark spots, smoother lines overall, and less wear and tear on your nibs.
2. It improves pattern transfer
If you’re transferring a design—whether using a heat transfer tip or graphite paper—a smooth surface gives you a cleaner, clearer, and more consistent transfer. No patchy lines. No guessing where your design lines should be.
My sanding process:
- Raw wood: Start with 80 grit → 100 grit → 120 grit, then continue increasing by increments (150, 180, 220) until you reach your preferred smoothness
- Pre-sanded wood: Usually start at 120 grit. Yes, I still sand “pre-sanded” wood—sometimes it just isn’t smooth enough for my liking
- Optional: Finish with 150–220 grit for a finer surface
⚠️ Tip: Don’t go too smooth. If the surface is overly polished, your pen can slip too easily and reduce control.
Your goal is a surface that feels smooth to the touch but still gives your tool enough grip to stay precise.
2. Use High-Quality (and Safe) Wood
“High quality” doesn’t mean “most expensive”—especially when you’re learning. But it does mean choosing wood that will work with you instead of against you.
What to look for:
1. Choose wood made for pyrography
Many craft stores carry basswood and similar woods specifically for burning. These are ideal for both beginners and experienced artists.
- Best beginner woods: Basswood, Poplar, Maple, Cherry
- Why: They’re consistent and burn evenly. Most are soft and easy to work with (maple being the exception), while still being affordable.
2. Avoid composite or veneer wood
Cheap “dollar store” wood is often layered or veneered. It might look fine on the surface, but it’s very easy to burn through the top layer—and once you do, the piece is essentially ruined.
Also, check the label. If the wood type isn’t listed and you can’t identify it, it’s best to avoid it. There are some woods you simply shouldn’t burn.
3. Be cautious with treated or finished wood
If you don’t know what’s been applied to the wood, don’t burn it.
- Finishes and chemicals can release toxic fumes
- Painted or sealed surfaces are a hard no
You can try sanding down to bare wood, but it depends on the finish. Oils penetrate deeply, while polyurethane sits more on the surface. In many cases, it’s not worth the risk or effort.
4. Watch out for difficult grain patterns
Some woods—like pine—can be tricky due to uneven grain and sap pockets. They can:
- Smell unpleasant when burned
- Create inconsistent burn marks
- Be harder to sand smooth
- Release sap when heated, which can damage your nibs
5. Check for warping
Warped wood can throw off your pressure, line consistency, and overall result. While it can sometimes be corrected, it’s usually not worth the effort—especially when you’re starting out.
3. Learn Your Machine Inside and Out
This is probably the most important one.
Your pyrography machine isn’t just a tool—it’s an extension of your hand. And like any tool, it behaves differently depending on the model, the tip, the heat setting, and even the wood you’re using.
Whenever I get a new burner, I spend hours just experimenting with it before starting a real piece.
What you need to understand:
1. Heat settings are not universal
A setting of “8” on one machine may behave completely differently on another.
- Always test on scrap wood (ideally the same species you’re using)
- Adjust based on wood type and desired effect
- Never assume consistency across machines
2. Every tip behaves differently
Each tip produces a unique mark, and that mark can vary depending on the burner.
- Fine tips → detail work
- Shader tips → gradients and fills
- Knife/flat tips → lines and texture
Even similar tips can behave very differently across machines—especially when comparing solid tips vs. wire tips.
3. Practice intentionally
Don’t just burn randomly—practice with purpose:
- Lines (light to dark)
- Shading gradients
- Texture patterns
- Pressure control
Try this: Create a texture board
Take a piece of wood and draw a grid of 1.5″ x 1.5″ squares across the surface. Then:
- Choose a tip and a temperature
- Fill one square with a texture, pattern, or shading style
- Adjust the temperature (higher or lower) and repeat in the next square
- Continue until you’ve filled the board using all your tips
Some artists label each square with the tip and temperature used, either directly on the board, on the back, or in a notebook.
Some pyrographers have multiple texture boards—others don’t use them at all. It’s entirely up to you, but it’s a powerful way to understand your tools.
Final Thoughts
Pyrography is one of those crafts where the little things make a big difference. Surface prep, material choice, and tool familiarity might not be the most exciting parts of the process—but they are the foundation of everything you create.
These are all lessons I learned over time, and honestly, I wish I had taken them more seriously from day one.
If you’re just starting out, focus on these basics. If you’ve been burning for a while, it’s never a bad idea to revisit them.
Let’s Hear From You
What are some things you wish you knew when you started?
Share your tips with us over on Instagram @bz_furfur—we love seeing what you’re working on and hearing what’s helped you grow.
And as always…
Stay unique. 🔥